A friend referred me to this tutorial when I asked where she had learned to make these rings. It sounded simple enough, so I retrieved the supplies I would need and set to work. For the mandrel around which I bent the wire band, I used a thick highlighter marker.

For my second attempt, I used 26-gauge wire instead of 20-gauge (because I have a TON of 26-gauge wire on hand). This was not a good decision--the wire was simply too thin. A ring made of it wouldn't stand up to much wear and tear at all without bending and probably breaking.

From then on, I was hooked. In two days, I have made more than thirty rings. They work up really quickly--most of them take less than ten minutes from start until finish!
Here are the steps I follow when I create my rings:
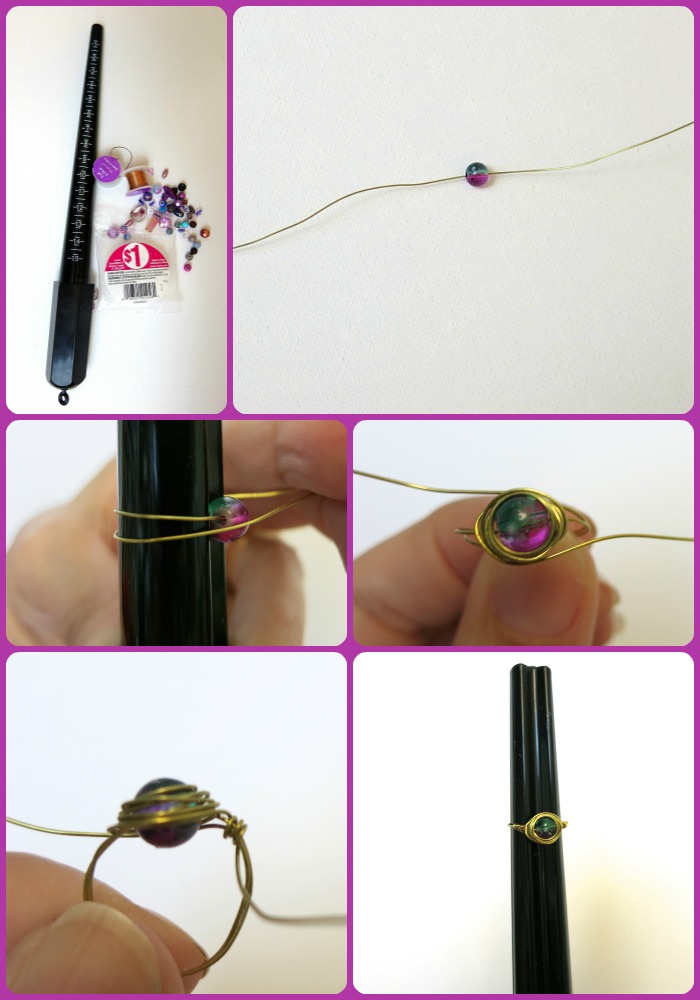 | |
| Photo tutorial is from Dollar Store Crafts. |
To create your ring, feed the bead halfway along the wire, so that it is in the center. Holding it against your mandrel, wrap each side of the wire all the way around until it reaches back to the the bead *on the side it started on*. That's right, pass under the bead and keep going until you get to the far side. This is how you create an actual, round ring (instead of the shape I wound up with in my first attempt)!
From here, your creativity takes over. Wrap the bead in any way you think looks lovely. Be sure to end your wrap with the loose ends of wire at each side of the bead, and leave yourself enough length to wrap the ends around the band at least twice. This finishes off your ring. Voila! It's complete.

This one is my favorite of the rings I have made thus far. It's made of a green seashell bead and 20-gauge gold-enameled copper wire. Sadly, I don't think I could intentionally duplicate it if I tried. That's the downside of letting the wire guide you.
And these nine round out my "Top Ten" favorites of the rings I have made so far!

No comments:
Post a Comment